
The more often you play table top games the more likely you are to run into times when you’ll find yourself wanting to add something to it yourself. Custom tokens can be used to replace lost components, facilitate the addition of house rules, or to provide alternate ways to track scores in the game.
Fortunately there is an easy way to make very nice custom tokens yourself at home, relatively cheaply. You’ll need a few things:
- Something to serve as the base of the token. You can get small wooden or plastic disks from hobby shops or craft stores, use existing tokens from other games (Sentinels of the Multiverse actually sells additional token packs that are perfect for this), or if you are feeling adventurous you can use a sheet of chipboard and a circular punch to create your own.
- A graphics program like Photoshop or Gimp to create the token images.
- A printer.
- Glue
- (Optionally) A home laminator. It’s not necessary, but laminating the printed token images before attaching them gives them a very nice looking finish.
For this tutorial we’ll be going with a fairly simple example. In Sentinels of the Multiverse each player controls a super hero, and each super hero has a number of hit points that are lost and gained over the course of the game. To track this the game provides small circular hit point tokens in various denominations. It works great for the various smaller targets, but for the heroes and villains with high hit points it can be a bit fiddly.
One solution to help the game flow more smoothly is to use a tracking board with the numbers 1-50 printed on it, and have tokens for each of the heroes and villains that can move on the board to indicate their current hit point count.
Tokens like this already exist, along with the board, in various locations. But what if you have created a custom character for the game? You’ll need a token of your own, and this is how you make it.
Making the Images
For our Sentinels example we will be making the custom token using the regular hp tokens from the game, or from the extra token pack.
I’ll be using photoshop for this portion, but you should be able to follow a similar method in any graphics package.
The first step is to make what is essentially a punch. A shape of the final size that you want for your token. The Sentinels tokens are roughly 0.8″ in diameter, so we want our token to be slightly smaller than that, at .78″.
Open a new project in photoshop, 8.5″ by 11″ with a white background. Since we’ll be printing these you will want to use a resolution of 300 pixels / inch. Then use the Ellipse tool to create a circle that is .78″ x .78″. If you don’t get it exactly right you can use Edit -> Transform -> Scale to set the height and width to exactly .78″.
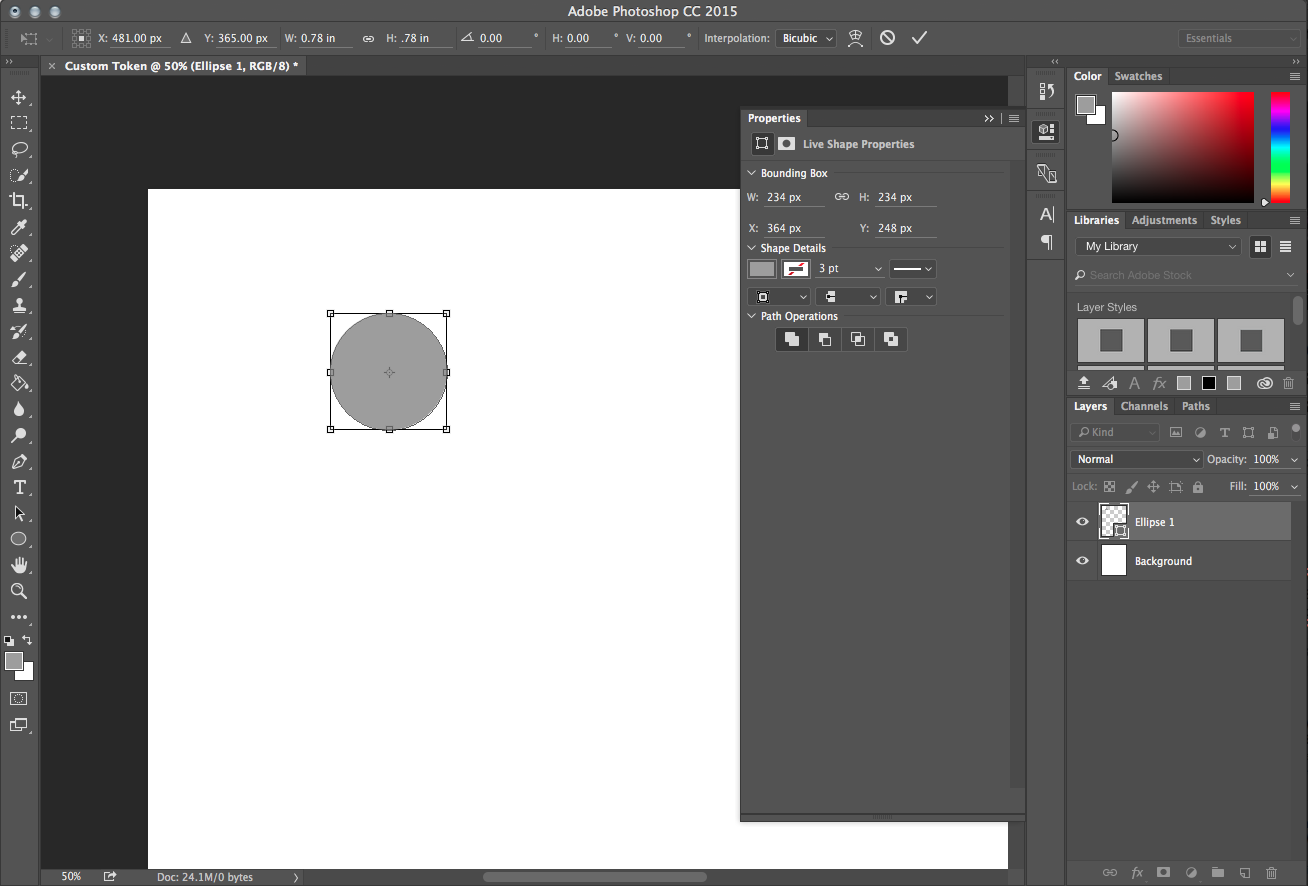
Once you have the shape where you want it you should rasterize the layer by right clicking on it in the Layers section and choosing “Rasterize Layer”.

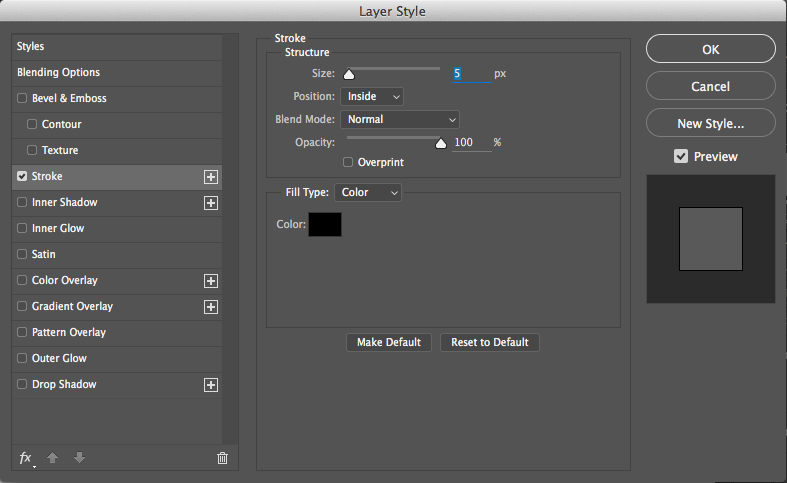
We are almost done with the punch. On the final image you will almost certainly want an outline, this will provide an obvious cutting point. You can choose to put the outline as an inner border, fully a part of the token, or you can move it to the outer border intending to completely cut it out of the final token. To add the border double click on the layer to bring up the “Layer Style” menu, check off the “Stroke” style, click on it, and set the size to something appropriate for your token, whatever looks good. In this case 5px should do it. Be sure to select the appropriate position for the outline, Inside or Outside. I’m placing it inside so that the border will be visible on the final token. This will leave the overall size of the punch at its original .78″ as well. Setting it to outside will increase the size of the punch, but the part inside the ring will remain unchanged. You want to avoid using the Center setting as that will throw off your final size.
Congratulations, you now have a perfectly formed punch for your tokens. As a final step you will want to set the opacity for the punch layer down to around 30%, so you can see what you are punching out.
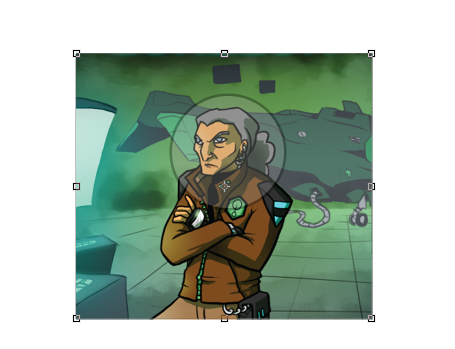
Now for the easy part. With your punch created you can make as many tokens as you like, from whatever images you have. Presumably if you are making a token for a custom Sentinels hero, that hero will already have artwork associated with it. For the example let’s make a token for the custom hero Echelon, part of the Cauldron fan expansion by Matthew Bishop. Her cards can be found here.
Copy and paste a portion of the image into your project, particularly you will probably want the face and a decent area around it. Move the pasted image under your punch, or move the punch over it, and resize the image until the punch frames the face the way you want it.
One you have the image sized the way you want you then click on the punch layer and select the Magic Wand tool from the tool box. Click anywhere outside of the circle of the punch to select everything except for the circle itself. Then switch back to your Echelon layer and hit delete. That will cut out everything on that layer that is not the .78″ diameter circle.
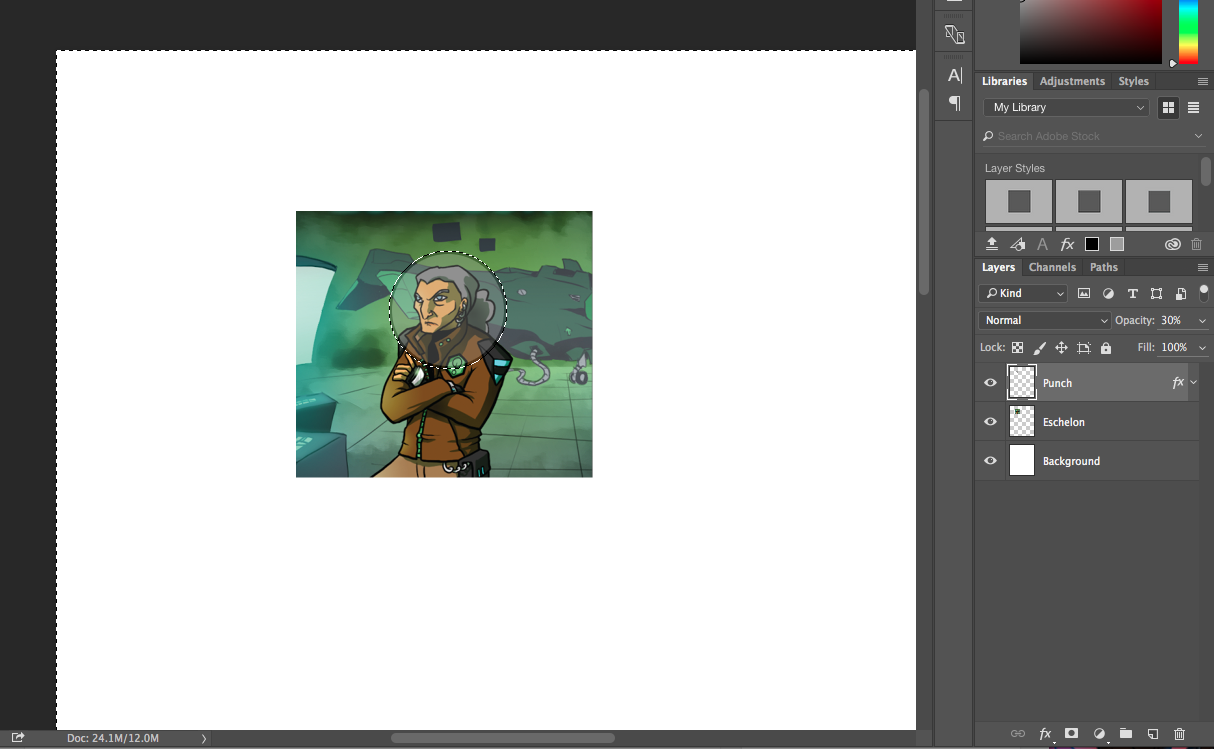

As a final step, copy the layer style from the punch to your Echelon layer to add the outline, though you’ll need to set the opacity back to 100%. Then hide the punch layer to view your new custom token.
Repeat these last steps as many times as you need to make all of the tokens that you want. Face tokens like these have a number of potential uses. Try using this technique with pictures of your gaming group for personalized score tracking tokens. The process will work best with square, rectangular, or circular shapes, just set the size of the punch to the size of your token material and have fun creating the images.
Making the Token
Once you have images for all of the tokens you want to make finishing the process is very easy. Just print the token sheet out, cut out the tokens, and glue them on your token material. That’s all you need.
However, if you want to improve the quality of the tokens you may want to invest in a small home laminator. These are simple to use and can add a nice finishing touch. The trick with using lamination for the tokens is that you only want to laminate the facing side of the tokens. Since most of the home laminating machines use pouches you will need to make sure that you send the tokens through the machine in two layers. If you only have one page of tokens, fold or cut it in half so that the tokens will be laminated on the image side, but not on the backs. Then you can cut around the edges of the sheet to separate the halves before cutting the tokens out and gluing them on.
So, there you have it, a simple way to make custom tokens for all of your games. Let your creativity flow, and crank some out.
Share this article with your friends!